
How to Clean a Coffee Maker Properly in Just 5 Minutes
A dirty coffee maker makes bitter, stale-tasting coffee and can shorten the machine’s lifespan. This 5-minute guide shows you exactly how to clean a coffee maker properly using common household items. Follow these simple steps to remove mineral deposits, coffee oils, and bacteria for a fresher brew every single morning.
That first cup of coffee in the morning tastes amazing — unless your coffee maker is dirty. Over time, mineral deposits from water, leftover coffee oils, and even tiny bits of mold can build up inside the machine. This buildup doesn’t just look gross. It makes your coffee taste bitter or sour. It can slow down brewing. And in serious cases, it can damage the heating element for good.
The good news? You don’t need expensive cleaners or a repair technician. You can clean a coffee maker properly in just 5 minutes using items you probably already have in your kitchen. This guide walks you through every step, from disassembling the parts to running the final rinse. You’ll learn how to descale, deodorize, and disinfect your machine so every pot tastes fresh and clean.
- Clean monthly: A vinegar-and-water descaling cycle removes mineral buildup that ruins flavor and slows brewing.
- Assemble your supplies first: You only need white vinegar, water, a sponge, and a cloth — nothing fancy.
- Rinse thoroughly: Always run 2 full fresh-water cycles after descaling to eliminate any vinegar aftertaste.
- Don’t forget the carafe: Hand-wash the carafe and filter basket with soap and water to remove coffee oils and stains.
- Wipe the exterior: Clean the warming plate and buttons to prevent sticky residue and bacterial growth.
- Troubleshoot issues: Slow brewing, bitter coffee, and strange smells all point to a machine that’s overdue for cleaning.
- Establish a routine: Daily rinsing, weekly wiping, and monthly deep cleaning keep your coffee maker in top shape.
Quick Answers to Common Questions
How often should I actually clean my coffee maker?
Give your coffee maker a deep clean at least once a month. If you drink several pots a day or live in an area with hard water, do it every two weeks. Daily rinsing of the carafe and weekly wiping of the exterior keep things fresh in between deep cleans.
Can I use descaling powder instead of vinegar?
Yes. Commercial descalers work well and often have a pleasant scent. Just follow the package instructions, and always rinse the machine thoroughly with two or three fresh-water cycles afterward. Vinegar is simply cheaper and easier to find.
Why does my coffee suddenly taste bitter or metallic?
That’s a classic sign of mineral scale and old coffee oil buildup inside the machine. Run a vinegar descaling cycle right away. Afterward, your coffee should taste clean and smooth again.
Can I clean a Keurig or single-serve pod machine this way?
Yes, with a small adjustment. Instead of a carafe, place a large mug under the dispenser. Run the vinegar solution through, let it sit, then run fresh-water cycles until the mug fills with clean, odor-free water. Remove and rinse the drip tray and water reservoir too.
What water should I use to prevent buildup in the first place?
Use filtered or bottled water whenever possible. Tap water is often high in calcium and magnesium, which creates the scale that clogs your machine. Filtered water dramatically reduces mineral deposits and extends the time between deep cleans.
📑 Table of Contents
- What You Will Need
- Step 1: Disassemble the Removable Parts
- Step 2: Mix and Pour the Cleaning Solution
- Step 3: Finish the Cycle and Rinse Thoroughly
- Step 4: Wash the Carafe and Filter Basket by Hand
- Step 5: Wipe Down the Exterior and Warming Plate
- Step 6: Reassemble and Run a Final Test Cycle
- Troubleshooting: Common Coffee Maker Problems
- Maintenance: Keep Your Coffee Maker Clean Longer
- Conclusion
What You Will Need
Before you start, gather these simple supplies. Having everything within reach keeps the clean coffee maker process quick and stress-free.
- White vinegar — the best natural descaling solution. It breaks down mineral deposits without harsh chemicals.
- Fresh water — for the cleaning solution and for rinsing cycles.
- A soft sponge or microfiber cloth — for scrubbing the carafe, filter basket, and exterior.
- A toothbrush (optional) — perfect for scrubbing tight spots like the showerhead or nozzle.
- Paper towels or a dry cloth — for wiping down surfaces and drying parts.
- Baking soda (optional) — great for removing stubborn coffee stains from the carafe.
Pro Tip: Check your coffee maker’s user manual before starting. Some manufacturers have specific cleaning recommendations, and a few models (like certain pod machines) require special descaling solutions. When in doubt, follow the manual.
Step 1: Disassemble the Removable Parts
Start by unplugging your coffee maker. Safety comes first. Next, remove everything that comes off easily. This includes the carafe (the pot), the filter basket, the lid, and any other detachable pieces. Turn the carafe lid counterclockwise and lift it off. Pull the filter basket out of its slot. Remove the showerhead or brewing nozzle if your model allows it.
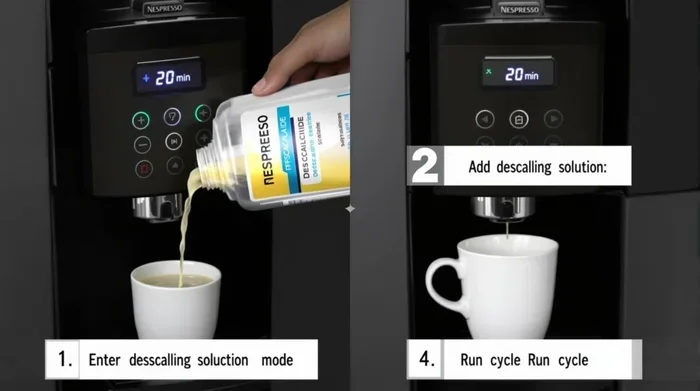
Visual guide about how to Descaling coffee machine
Image source: coffeemachinetools.com
Why bother? Because coffee oils and old grounds hide in these removable parts. Cleaning them separately ensures every surface gets proper attention.
Some parts are dishwasher-safe. Others are not. Plastic lids and carafes often warp in the dishwasher. Check for the dishwasher-safe symbol or consult your manual. If unsure, hand-wash everything with warm, soapy water. It takes 2 extra minutes and avoids costly damage.
Step 2: Mix and Pour the Cleaning Solution
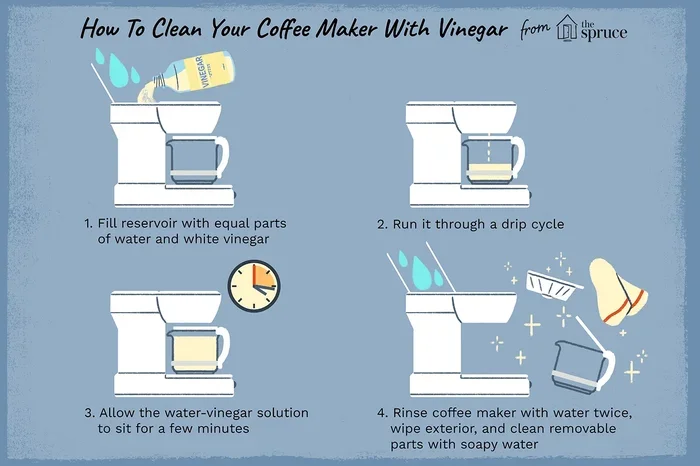
Now it’s time to make your cleaning solution. The classic ratio is one part white vinegar to two parts water. So if your coffee maker’s reservoir holds 6 cups, pour in 2 cups of vinegar and 4 cups of fresh water.
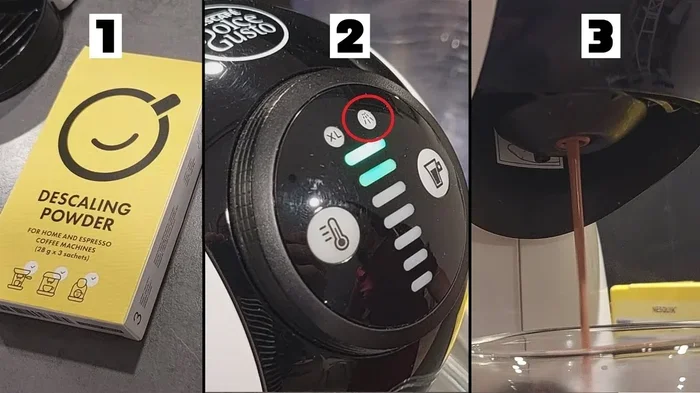
Visual guide about how to Descaling coffee machine
Image source: i.ytimg.com
Pour the solution into the water reservoir. Make sure the carafe is empty and placed back on the warming plate. This catches the solution as it brews through.
Turn on the coffee maker and start the brew cycle. Let it run halfway through. Then switch it off (press the “Off” button or unplug it). Let the solution sit inside the machine for 30 to 45 minutes. This soaking time is crucial — it lets the vinegar dissolve all those yucky mineral deposits and coffee oils hiding inside the internal tubes.
Running vinegar through without stopping is a waste of time. The liquid rushes through too quickly to actually dissolve the scale. The pause-and-soak method works much better. While you wait, you can tackle Step 4 (washing the carafe) to make great use of the time.
Step 3: Finish the Cycle and Rinse Thoroughly
After the 30-minute soak, turn the coffee maker back on. Let the remaining vinegar solution finish brewing through into the carafe. When it’s done, pour the solution down the sink.
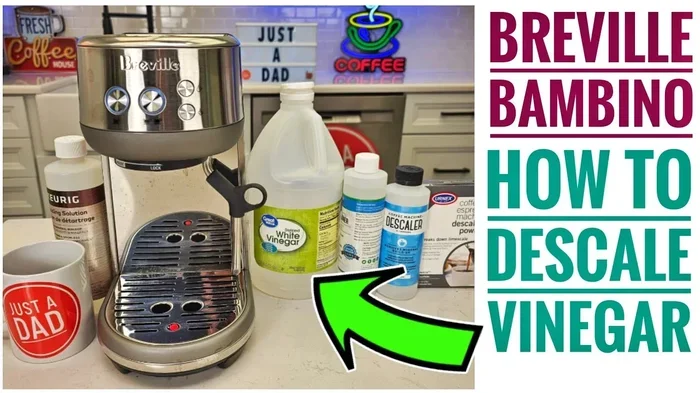
Visual guide about how to Descaling coffee machine
Image source: i.ytimg.com
Now comes the most important part: rinsing. Fill the reservoir with fresh water only. Run a full brew cycle. Pour out the water. Then do it again. That’s right — two full cycles of fresh water.
Sniff the steam coming from the machine during the final rinse. If you smell vinegar, run a third rinse cycle. A subtle vinegar smell in the first batch of water is normal. But if it lingers into your next pot of coffee, your brew will taste terrible. Two or three rinses should be plenty for most machines.
Step 4: Wash the Carafe and Filter Basket by Hand
While the machine is doing its thing, fill your sink with warm, soapy water. Use a gentle dish soap. Submerge the carafe and filter basket. Scrub them with a soft sponge to remove coffee stains and oily residue. Pay special attention to the bottom of the carafe and the crevices of the filter basket. Coffee oils cling to these surfaces and turn rancid over time.
Rinse each part thoroughly with warm water to remove all soap. Set them on a drying rack or pat them dry with a clean cloth.
If your carafe has brown, cloudy stains that won’t budge, sprinkle a spoonful of baking soda into it. Add a splash of warm water to form a paste. Scrub gently with a sponge. The mild abrasive safely lifts those baked-on coffee stains without scratching the glass. For extremely stubborn spots, fill the carafe with a half-vinegar, half-water mix and let it soak overnight.
Step 5: Wipe Down the Exterior and Warming Plate
The outside of your coffee maker gets touched every day. Fingerprints, coffee drips, and dust all collect on the surface. After you finish cleaning the carafe, grab a soft cloth or sponge. Dip it in warm, soapy water and wring it out well — you don’t want dripping water near electrical parts.
Wipe down the exterior surfaces, including the sides, the top, and the control buttons. Pay special attention to the warming plate where the carafe sits. Drips of coffee that burn onto that plate create an awful burned smell. A quick wipe fixes this in seconds.
Use a dry toothbrush to gently scrub any crevices or spots around the buttons and the base where residue likes to hide.
Never clean the exterior while the warming plate is hot. A hot surface plus a wet cloth equals steam burns and potential damage. Always unplug the machine and let it cool completely before wiping it down. This also prevents any liquid from seeping into the electrical components.
Step 6: Reassemble and Run a Final Test Cycle
Once everything is clean and dry, it’s time to put it all back together. Place the filter basket back into its slot. If you use a permanent (reusable) filter, pop that in too. Set the carafe back on the warming plate, positioning it under the brew basket.
For your final test, fill the reservoir with fresh water and run one more brew cycle. This confirms all parts are seated correctly. It also flushes out any soapy water that might have lingered in the reservoir area. When the water finishes brewing, pour it out. Your coffee maker is now spotless and ready to brew.
Set a monthly reminder on your phone or write “clean coffee maker” on your calendar. Regular maintenance is the secret to a long-lasting machine and consistently delicious coffee. If you use your coffee maker multiple times a day or have hard water, clean it every two weeks instead.
Troubleshooting: Common Coffee Maker Problems
Is your coffee maker acting weird? Here’s how to diagnose the issue and fix it fast.
- Slow brewing: Mineral scale clogs the internal water tubes. Run a descaling cycle with white vinegar. If brewing speed doesn’t improve after two cycles, the tubes may need professional cleaning.
- Bitter or sour coffee: Old coffee oils and residue are tainting the flavor. Deep-clean the entire machine, including the carafe and filter basket. Also, replace your coffee beans or grounds — stale coffee also tastes bitter.
- Strange smells: A sour or musty odor means mold or bacteria is growing somewhere. Disassemble everything and wash with soap and water. Then run two vinegar cleaning cycles followed by a water rinse.
- Cloudy carafe: Mineral deposits have etched or coated the glass. Soak the carafe in a vinegar-and-water solution for an hour, then scrub with baking soda paste.
- Weak, watery coffee: A clogged showerhead restricts water flow over the grounds. Remove the showerhead (if detachable) and soak it in vinegar for 30 minutes. Scrub the holes with a toothpick.
- Machine shuts off mid-brew: This can signal overheating from scale buildup. Descale immediately. If the problem continues, contact the manufacturer — the heating element may be failing.
Maintenance: Keep Your Coffee Maker Clean Longer
Small daily habits make a huge difference between deep cleans. Try these simple routines.
Daily
After brewing, empty the carafe and rinse it with warm water. Leave the lid open so it can air dry. This prevents stale coffee oils from building up. If you use a reusable filter, rinse it out and let it dry.
Weekly
Wipe down the warming plate and exterior with a damp cloth. This removes drips and dust before they bake on. Quick and easy — about 30 seconds.
Monthly
Do the full 5-minute deep clean described in this guide. This keeps your coffee maker free from scale, mold, and rancid oils.
Every Brew
Use fresh, filtered water instead of tap water when possible. This cuts down on mineral deposits dramatically. Also, replace paper filters regularly — don’t reuse them. A clean filter means cleaner coffee.
Conclusion
A clean coffee maker is the difference between a great morning cup and a disappointing one. By spending just 5 minutes each month, you get coffee that tastes crisp, fresh, and full of flavor. Your machine will last longer too — no expensive repairs or early replacements.
the golden rule: vinegar descales, water rinses, soap cleans. Follow the steps above, and your coffee maker will reward you with perfect brews for years to come. So grab that bottle of vinegar, set a monthly reminder, and taste the difference a clean machine makes.